Manual Partition Installation Guide
Installing TeaLinuxOS with manual partitioning gives you full control over how your disk is structured.
This method is ideal for advanced users who want to:
- Separate system and user data (e.g. create a custom
/homepartition) - Use different file systems such as BTRFS or XFS
- Set up LVM, encryption, or specific partition layouts
Steps for Manual Partitioning
-
Boot from the Installation Media
Insert your TeaLinuxOS USB/DVD and boot your computer.
Choose the option to start the installation. -
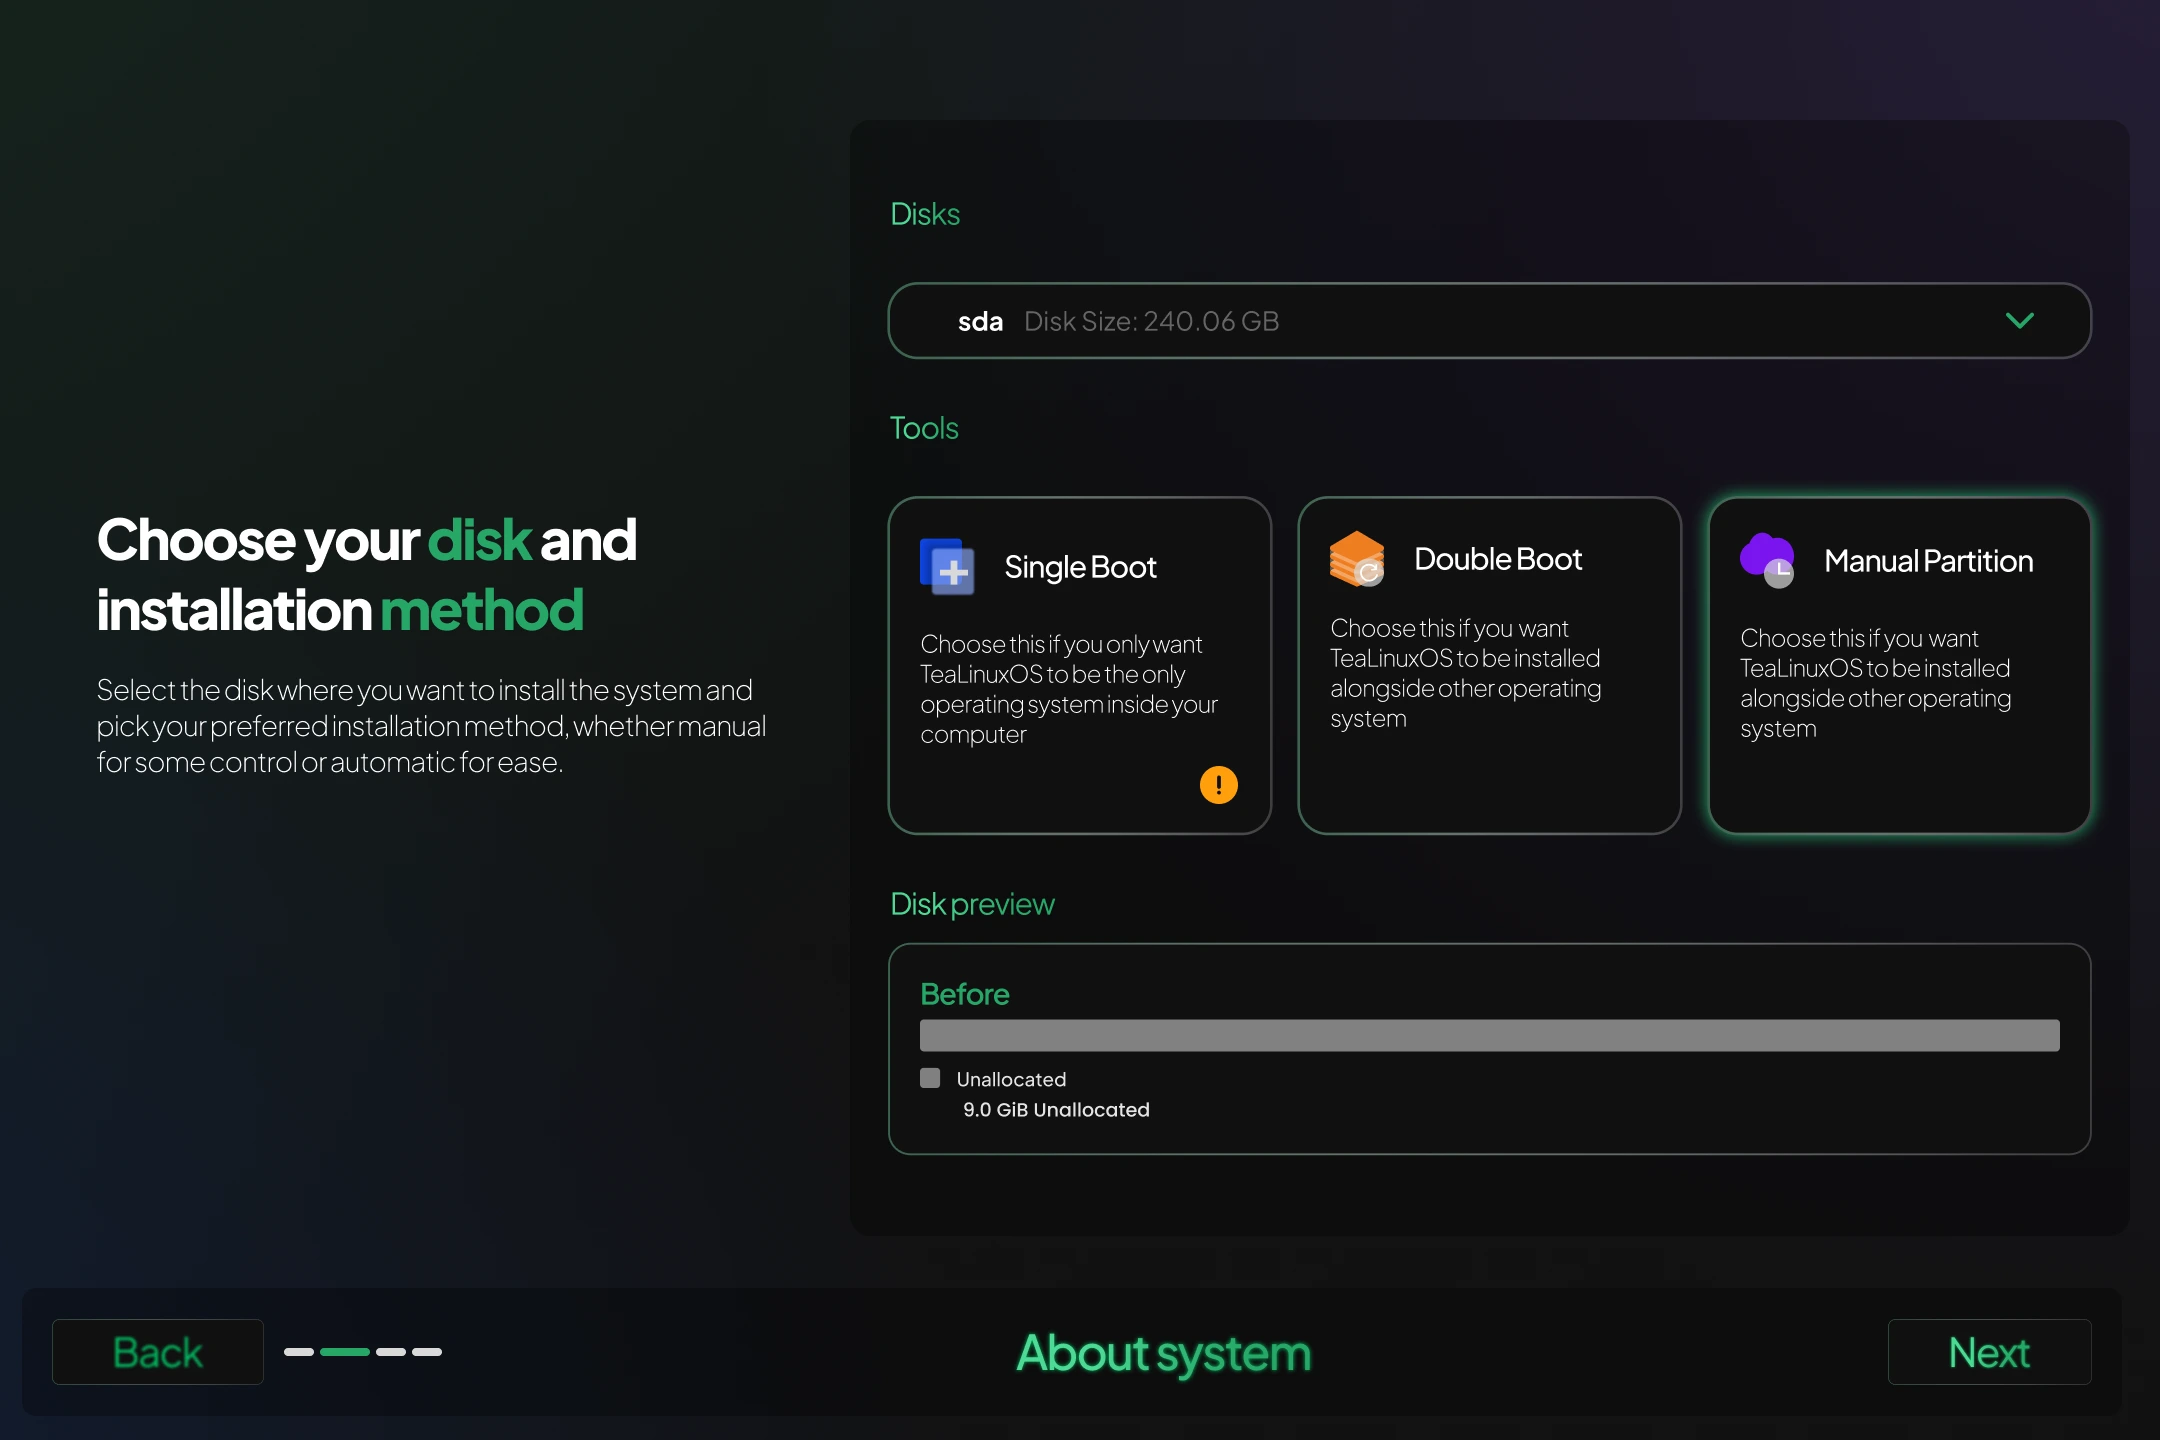
Choose Installation Type: Manual Partitioning
On the partitioning screen, select the Manual option.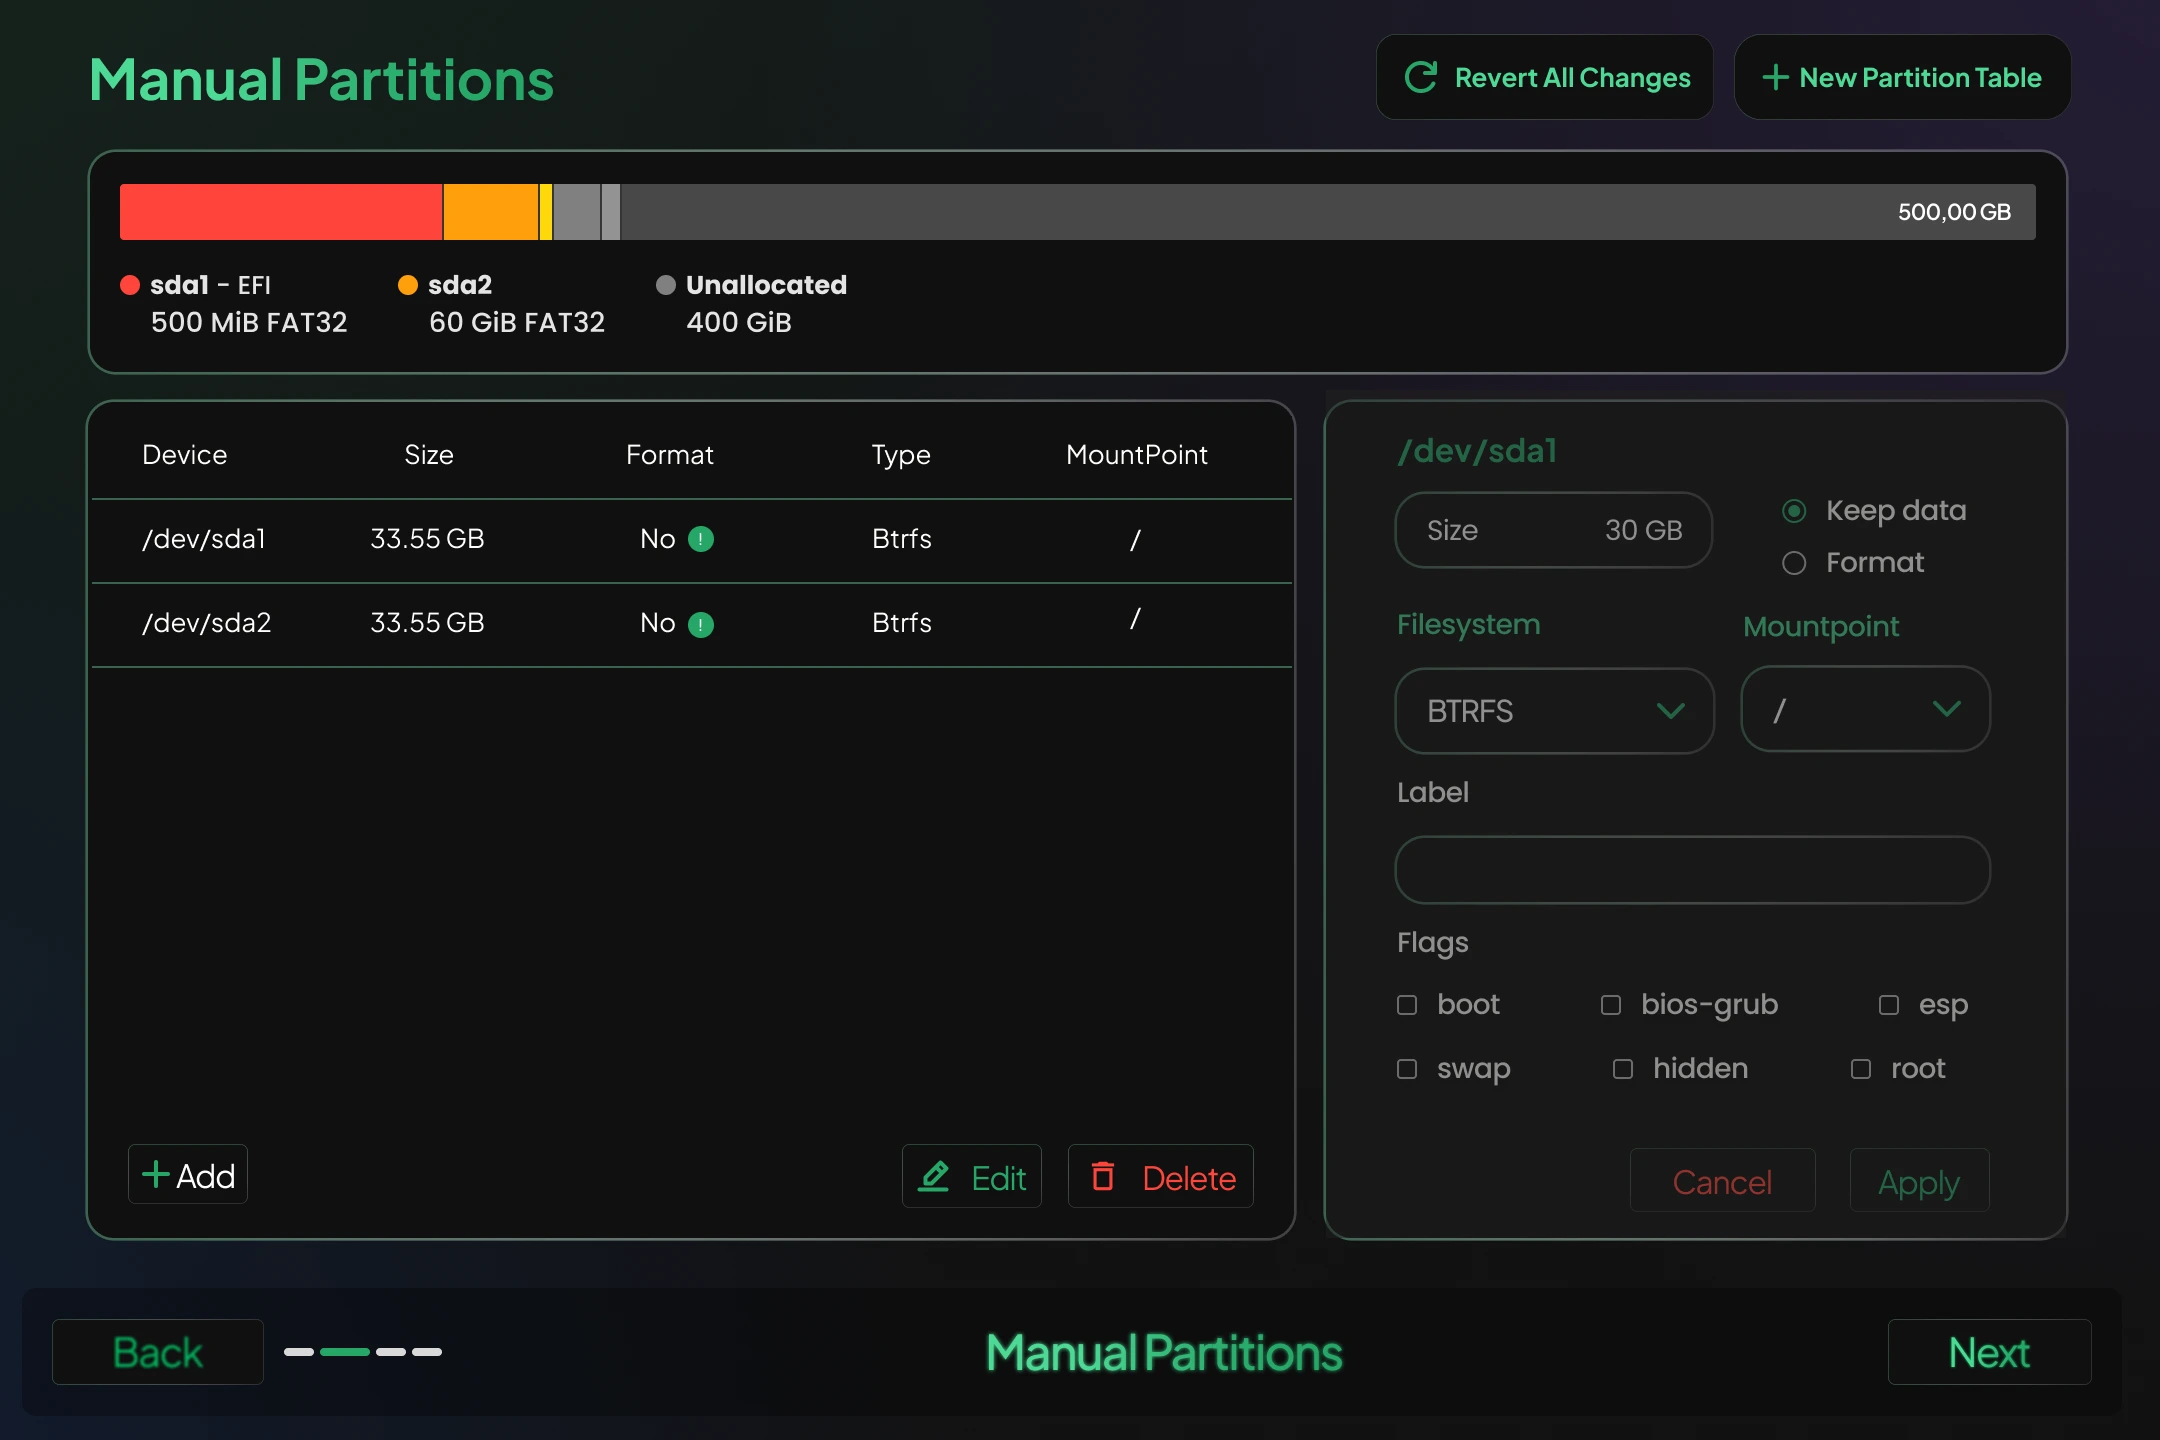
-
Disk and Partition Setup
You will see a list of available disks and existing partitions. From this screen, you can:- Create new partitions (e.g.
/,/home,swap) - Choose mount points
- Set file system types (e.g. EXT4, BTRFS)
- Resize or delete partitions
- Create new partitions (e.g.
Partition Table Behavior
-
If a partition table already exists, a new one will follow the same type:
- MBR → MBR
- GPT → GPT
-
If no partition table exists (common in virtual machines), a new GPT table will be created by default.
Firmware and Mount Point Requirements
UEFI Systems (Requires GPT)
/boot/efi– at least 512 MiB (FAT32)/– at least 20 GiB
⚠️ Without
/boot/efi, UEFI-based systems will fail to boot.
Legacy BIOS Systems (MBR or GPT)
/– at least 20 GiB
EFI partition is not required for BIOS installations.
SWAP Configuration
- If no dedicated swap partition is created, TeaLinuxOS uses dynamic swap (zram) by default.
- You may still manually create a traditional swap partition if you prefer manual control.
💡 For most users, dynamic swap is sufficient and saves disk space.
Review and Confirm
Before proceeding, review all partition and mount point configurations.
Only the selected partitions will be formatted — unless you clicked “New Partition Table”, in which case all partitions on the disk will be removed.
Final Step: Continue Installation
Once confirmed, the installer will move to the next steps such as timezone selection, user account setup, and finishing the installation process.