Manual Partition Installation Guide
Installing TeaLinuxOS with manual partitioning gives you full control over how your disk is structured.
This method is ideal for advanced users who want to:
- Separate system and user data (e.g. create a custom
/homepartition) - Use different file systems such as BTRFS or XFS
- Set up LVM, encryption, or specific partition layouts
# Steps for Manual Partitioning
- Boot from the Installation Media
Insert your TeaLinuxOS USB/DVD and boot your computer.
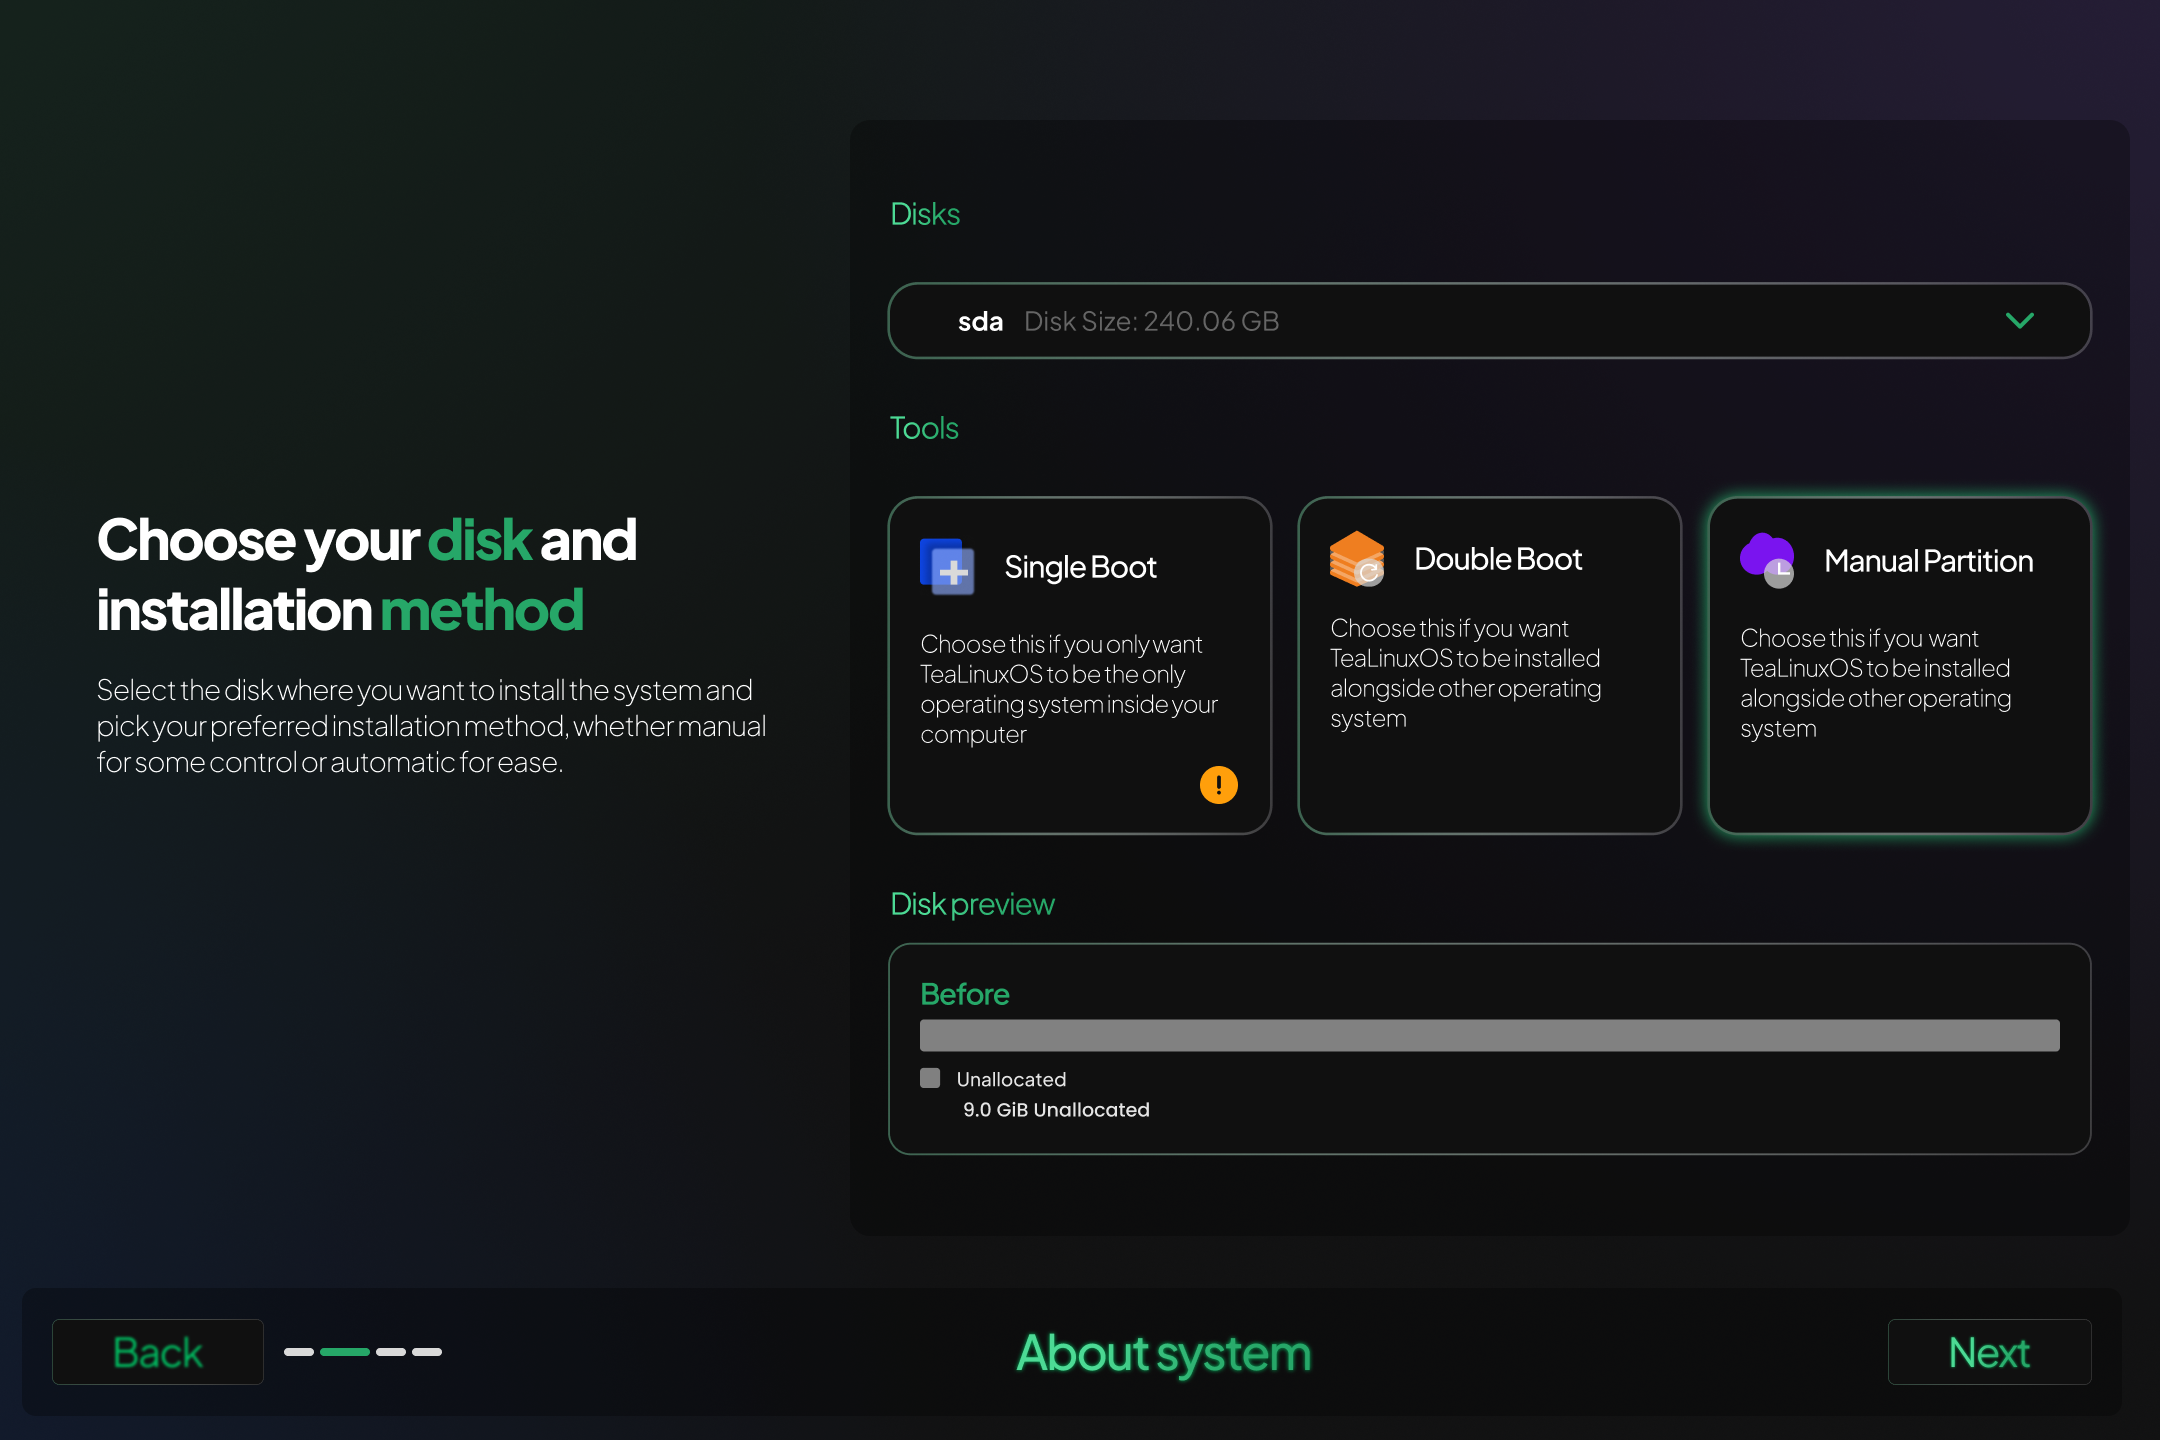
Choose the option to start the installation. - Choose Installation Type: Manual Partitioning
On the partitioning screen, select the Manual option.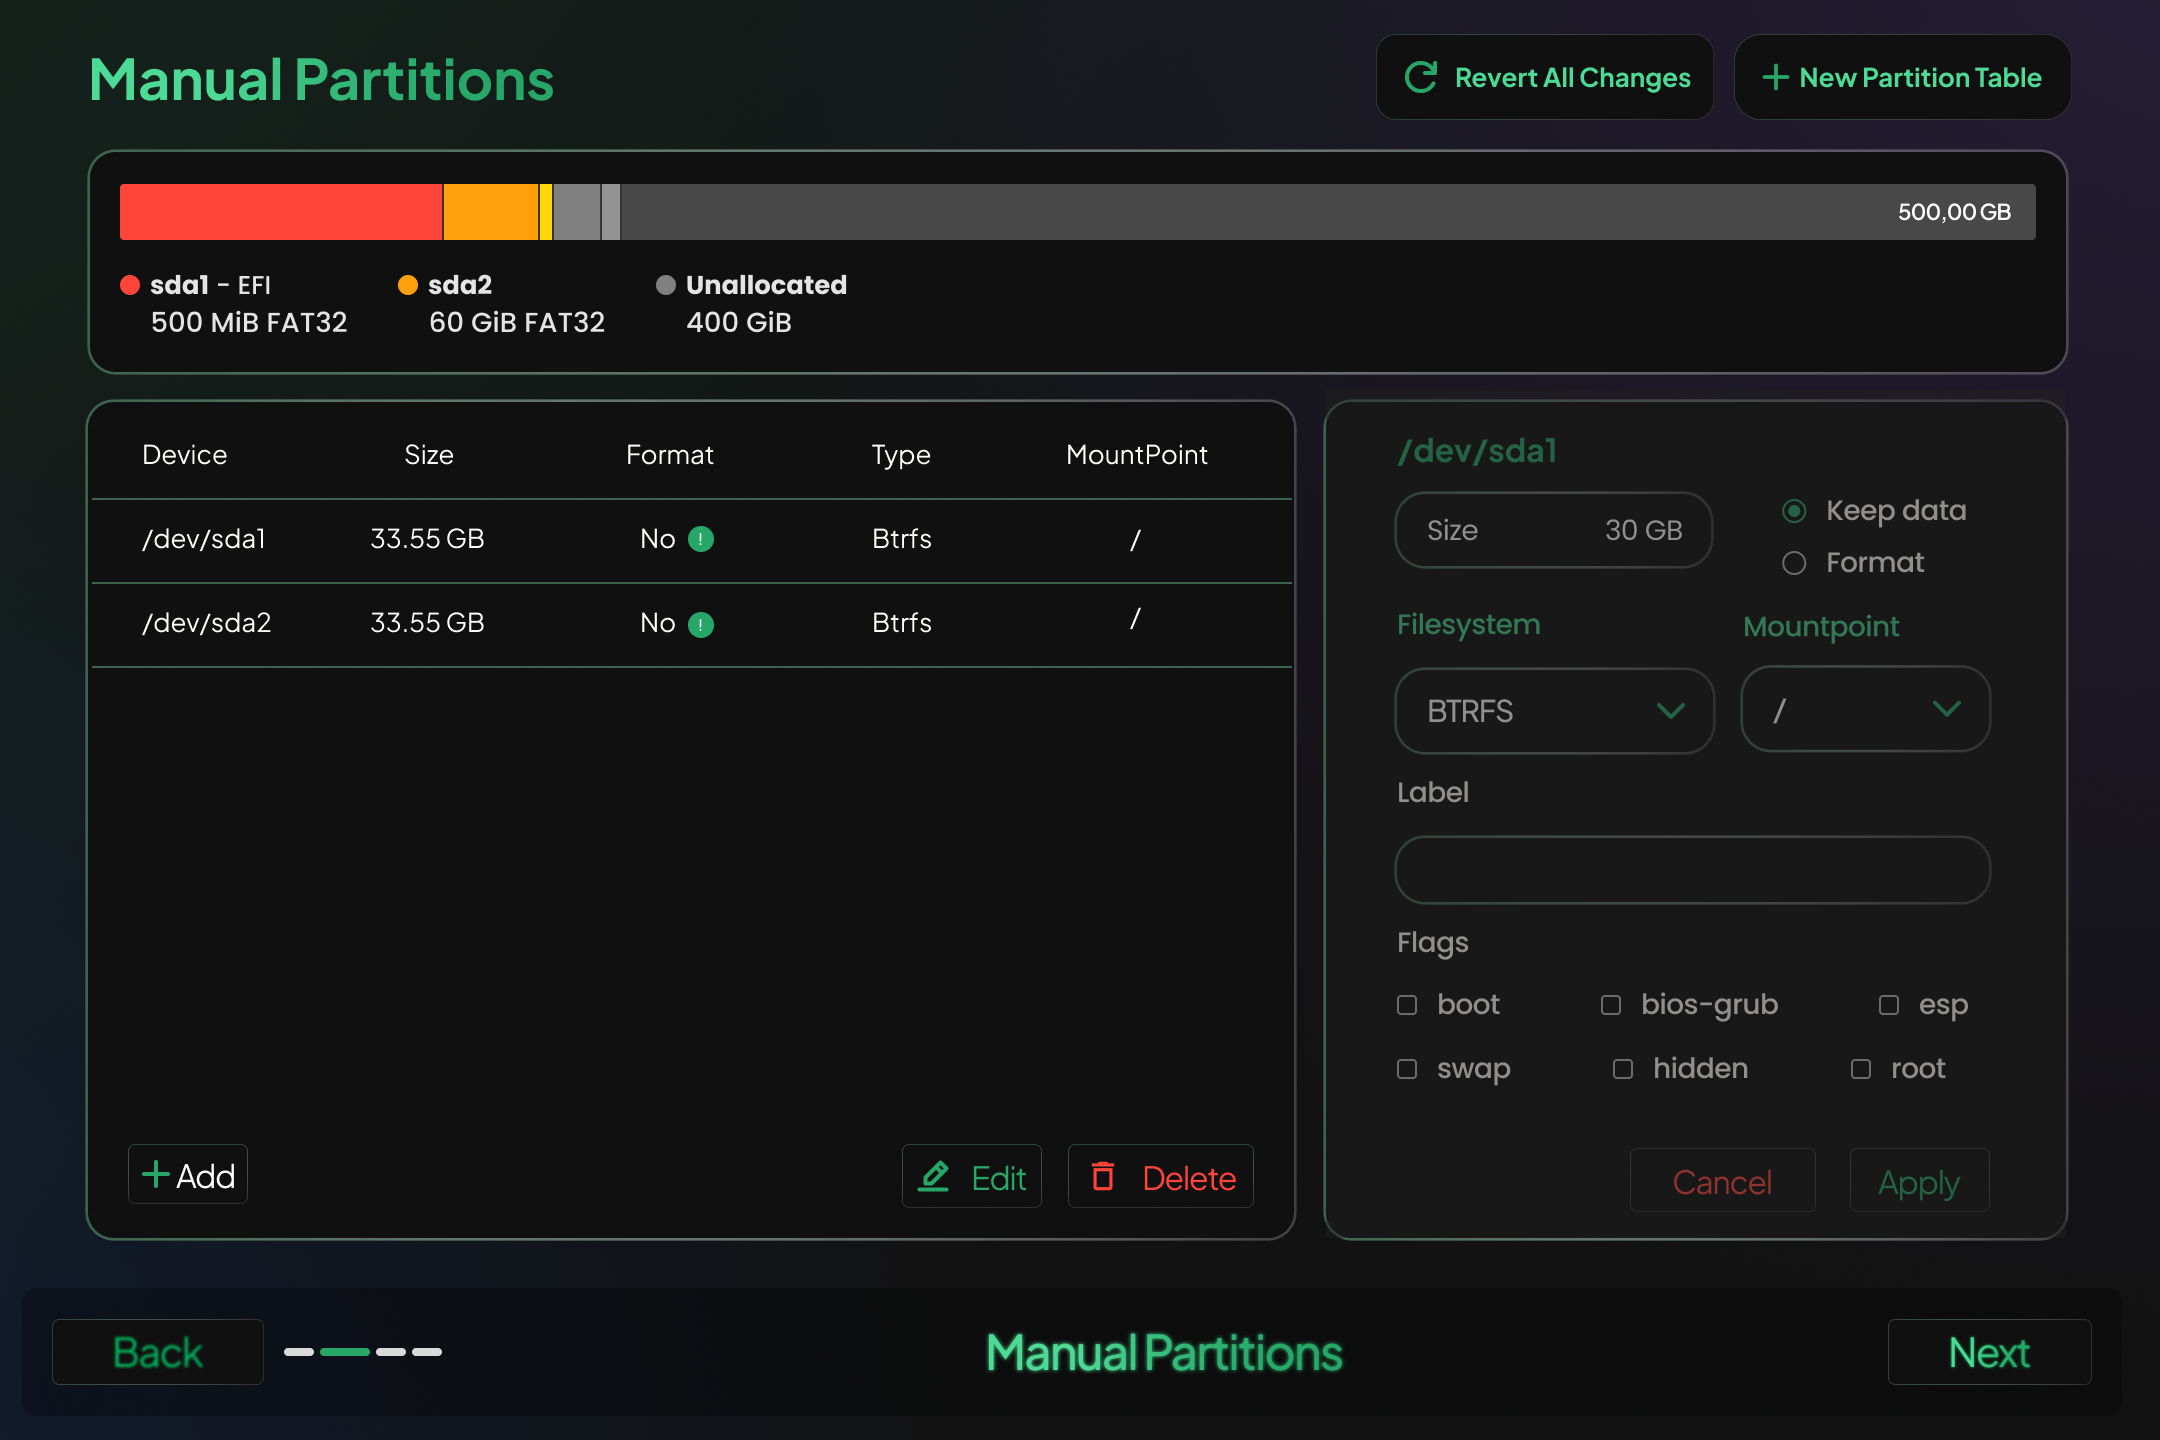
- Disk and Partition Setup
You will see a list of available disks and existing partitions. From this screen, you can:- Create new partitions (e.g.
/,/home,swap) - Choose mount points
- Set file system types (e.g. EXT4, BTRFS)
- Resize or delete partitions
ImportantIf you click 'New Partition Table', all existing partitions on the selected disk will be erased. This action is irreversible. Use it only if you're sure you want to start fresh on that disk.
- Create new partitions (e.g.
# Partition Table Behavior
- If a partition table already exists, a new one will follow the same type:
- MBR → MBR
- GPT → GPT
- If no partition table exists (common in virtual machines), a new GPT table will be created by default.
# Firmware and Mount Point Requirements
# UEFI Systems (Requires GPT)
/boot/efi– at least 512 MiB (FAT32)/– at least 20 GiB
⚠️ Without
/boot/efi, UEFI-based systems will fail to boot.
# Legacy BIOS Systems (MBR or GPT)
/– at least 20 GiB
EFI partition is not required for BIOS installations.
# SWAP Configuration
- If no dedicated swap partition is created, TeaLinuxOS uses dynamic swap (zram) by default.
- You may still manually create a traditional swap partition if you prefer manual control.
💡 For most users, dynamic swap is sufficient and saves disk space.
# Review and Confirm
Before proceeding, review all partition and mount point configurations.
Only the selected partitions will be formatted — unless you clicked “New Partition Table”, in which case all partitions on the disk will be removed.
# Final Step: Continue Installation
Once confirmed, the installer will move to the next steps such as timezone selection, user account setup, and finishing the installation process.
Always back up your important data before partitioning. Double-check the target disk, especially when dual-booting. You can also use tools like GParted before starting the installer for easier partition management.